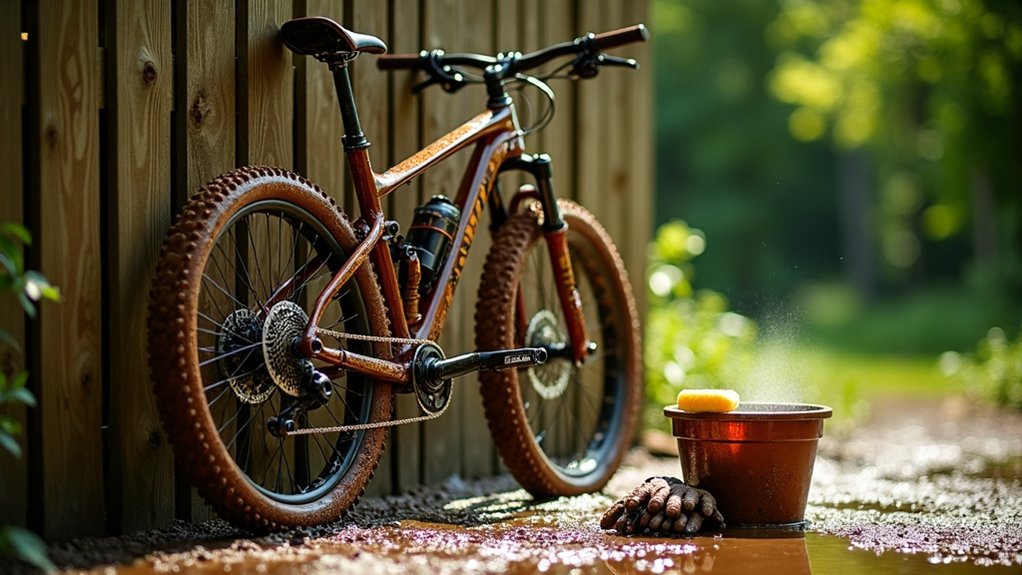
After a muddy ride, clean your bike immediately to prevent damage from dried mud. Start by parking in an eco-friendly area, then remove clumps of mud and debris. Rinse it thoroughly with a pressure washer, focusing on tricky spots. Apply a cleaning solution and let it sit for a few minutes before scrubbing with a soft brush. Don’t forget to maintain sensitive components. Keep going to discover more about effective maintenance tips for your bike.
Key Takeaways
- Clean your vehicle immediately after muddy rides to prevent dried mud from hardening and causing damage.
- Remove large debris and protect sensitive components before rinsing the vehicle.
- Use a pressure washer to pre-rinse, starting from the top and focusing on hard-to-reach areas.
- Apply a cleaning solution like Fast Cherry Off-Road Wash, letting it sit for 2-3 minutes before scrubbing.
- Regularly inspect and document vehicle condition every 3-6 months to catch maintenance issues early.
Importance of Immediate Cleaning After Muddy Rides
When you ride through mud, it’s essential to clean your vehicle right away, as letting the mud dry can turn it into a tough, sticky mess that’s hard to remove. This isn’t just about aesthetics; dried mud can damage rubber seals and critical lubricants, compromising your vehicle’s integrity.
Certain mud types, like red mud, can be corrosive, threatening components like alternators and electrical systems. By applying pressure during cleaning, you can effectively remove dirt that acts like sandpaper on moving parts.
Regular immediate cleaning helps extend your vehicle’s lifespan, reducing the risk of costly repairs and ensuring peak performance.
Preparation Steps for Cleaning Your Bike
Before diving into the cleaning process, make sure you’ve set the stage for a successful wash. First, park your bike in a designated area where water runoff won’t harm the environment.
Remove any large debris like mud clumps and leaves from the wheels and undercarriage. This prevents clogging during the wash.
Protect sensitive components, such as the bottom bracket and headset, using plastic or tape to avoid damage.
Gather all necessary cleaning supplies, including brushes, rags, and degreaser.
Finally, inspect your bike for any damage or issues that need attention, ensuring timely repairs during your cleaning session.
Effective Pre-Rinsing Techniques
After preparing your bike for cleaning, the next step is pre-rinsing, which sets the foundation for a thorough wash.
Grab a pressure washer and start from the top, working your way down to effectively rinse off the mud without redistributing it. Pay special attention to the undercarriage, wheel wells, and those tricky spots where dirt accumulates.
Using a wide-angle nozzle, set at 25 or 40 degrees, helps loosen the mud without damaging sensitive parts.
Application of Cleaning Solutions
Now that you’ve pre-rinsed your vehicle, it’s time to mix your cleaning solution for maximum mud removal.
Combine 1-2 ounces of Fast Cherry Off-Road Wash with a gallon of water, and grab a foam cannon or bucket for application.
This foamy mixture will cling to the surfaces, breaking down grime while minimizing the need for harsh scrubbing.
Mixing Cleaning Solutions
Mixing the right cleaning solution is essential for tackling the stubborn mud that clings to your ride. For effective mud breakdown, mix 1-2 ounces of Fast Cherry Off-Road Wash with a gallon of water.
Use a foam cannon or bucket to apply the cleaning solution, allowing it to cling to the surface and soften the dirt. Let the soap sit for 2-3 minutes before rinsing to maximize its dirt-loosening properties.
If you’re dealing with particularly stubborn grime, consider using a soft-bristle brush for thorough coverage. Just remember, avoid letting the soap dry to prevent residue build-up.
Applying Foam Effectively
When you’re ready to tackle the layers of mud on your ride, applying foam effectively can make all the difference in achieving a thorough clean. Use a foam cannon or bucket to evenly apply your cleaning solution, mixed according to the manufacturer’s instructions. Start from the top, letting the foam cling to dirt and grime for 2-3 minutes. Avoid letting it dry, as this can cause residue buildup. For stubborn spots, gently use a soft-bristle brush after applying the foam to enhance cleaning without damage.
| Step | Action |
|---|---|
| 1. Mix Solution | 1-2 oz per gallon of water |
| 2. Apply Foam | Use foam cannon or bucket |
| 3. Let Sit | Allow 2-3 minutes to break down mud |
| 4. Rinse | Thoroughly rinse off foam |
| 5. Brush Stubborn Grime | Gently scrub with a soft-bristle brush |
Detailed Scrubbing Techniques
A thorough cleaning after a muddy ride demands careful attention to detail, especially when it comes to scrubbing techniques.
Focus on the bottom bracket and other crevices where mud and dirt can hide. Here are some tips for effective scrubbing:
- Use a soft-bristle brush for gentle scrubbing.
- Allow a soap solution to sit for 2-3 minutes before scrubbing.
- Pay close attention to hard-to-reach areas to avoid trapped mud.
- Rinse your brush regularly to prevent dirt re-application.
Drivetrain and Chain Maintenance
After scrubbing away the mud and grime from your bike’s frame, it’s time to give special attention to the drivetrain and chain.
Shift your bike into the big chainring and small gear for easier access. Using a dedicated chain brush and degreaser, clean the chain, cassette, and derailleur thoroughly, removing all dirt.
Rinse the chain with water to eliminate debris, preventing rust or wear buildup. Once dry, apply lubricant sparingly—just one drop per link—to guarantee even coverage and minimize dirt attraction.
Regular drivetrain maintenance is essential, especially after heavy mud rides, to avoid malfunctions and prolong component life.
Long-term Maintenance Considerations
To keep your bike in top shape after those muddy adventures, you need a regular inspection schedule for bearings and seals.
Each time you clean, take note of any issues you spot, as this helps you track problems and plan for repairs.
Staying proactive with maintenance not only enhances performance but also extends the life of your ride.
Regular Inspection Schedule
Establishing a regular inspection schedule is essential for maintaining your vehicle’s performance, especially after tackling muddy terrain. By checking your vehicle every 3-6 months, you can prevent serious damage caused by mud and dirt accumulation.
Focus on the following areas during your inspections:
- Bearings and seals
- Drivetrain and brake systems
- Suspension components
- Signs of wear or damage
Incorporate seasonal checks before and after heavy mudding to guarantee all parts function correctly.
Conduct detailed inspections post-mudding sessions to identify immediate cleaning or maintenance needs, keeping your vehicle in top shape for the next adventure.
Documenting Issues Found
While keeping up with regular inspections helps maintain your vehicle’s performance, documenting any issues found during the cleaning process is equally important for long-term maintenance.
Track worn parts, rust, or damage to monitor maintenance activities over time. Create a log that highlights specific areas prone to mud accumulation, which allows for targeted cleaning and preventive measures.
Regularly reviewing your documentation assists in scheduling timely repairs or replacements, prolonging your vehicle’s lifespan.
Enhance your records with photos or detailed descriptions for a visual reference, ensuring you stay informed about your vehicle’s condition and maintenance needs.