To test freehub engagement on e-bikes, start by securing the bike on a stand and removing the rear wheel. Spin it backward to listen for clicking sounds, which indicate pawl engagement. Pedal while holding the wheel; immediate engagement shows proper power transfer. Check for smooth spinning and unusual noises, like grinding. If issues arise, you may need to troubleshoot or maintain the freehub. Continue exploring to learn more about ideal maintenance and performance insights.
Key Takeaways
- Spin the rear wheel backwards and listen for a consistent clicking sound to ensure proper pawl engagement.
- Check for smooth rotational movement; resistance or grinding noises may indicate internal issues with the freehub.
- Conduct a pedal test while holding the wheel; immediate engagement signifies proper power transfer from the pedals.
- Observe the wheel’s spin duration; a longer spin indicates good freehub functionality and minimal resistance.
- Inspect the pawl mechanism for dirt or lack of lubrication, which can affect engagement performance over time.
Preparing Your E-Bike for Testing Freehub Engagement
Before you begin testing the freehub engagement on your e-bike, it’s essential to guarantee the bike is positioned securely, either on a stand or flipped upside down.
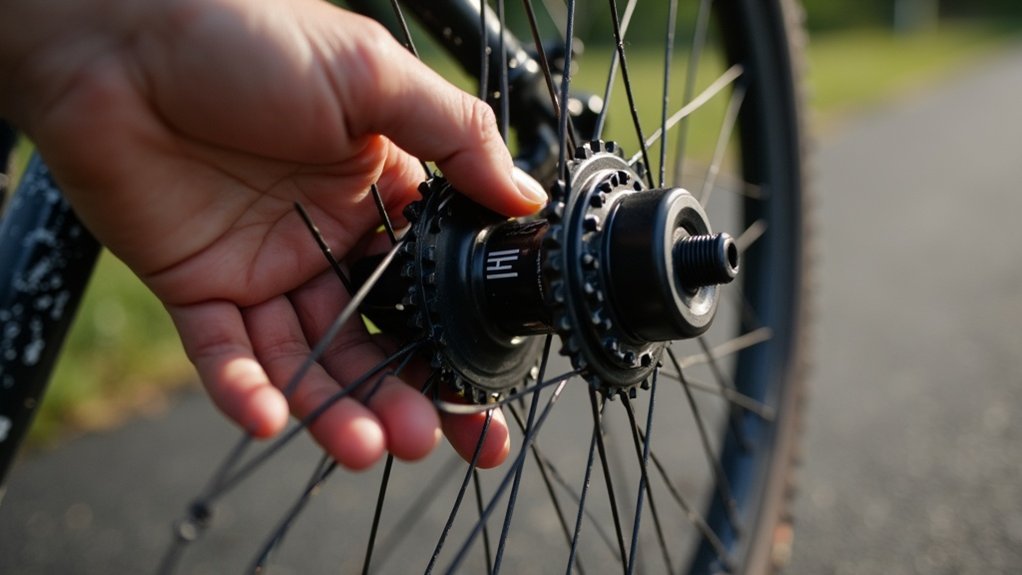
Start by removing the rear wheel to isolate the rear hub, ensuring no drivetrain interference during the test. Once detached, you can spin the rear wheel backwards gently and listen for clicking sounds, which indicate proper pawl engagement.
Also, check for smooth rotational movement; resistance may reveal internal issues within the freehub.
After the spin test, reassemble the rear wheel, confirming that the cassette or freewheel is securely attached for accurate engagement testing.
Spinning the Rear Wheel: Initial Assessment
To start your assessment, lift the rear wheel off the ground and give it a quick flick to spin freely.
Pay attention to any unusual sounds, as grinding or clicking may signal issues with the freehub’s pawl mechanism.
Finally, check for any resistance; a smoothly spinning wheel indicates proper freehub functionality.
Wheel Spin Technique
One effective method for evaluating the freehub engagement on eBikes is the wheel spin technique.
Begin by lifting the rear wheel off the ground and giving it a spin. Observe how smoothly it rotates and how long it continues to spin without pedaling. A significant duration indicates proper freehub engagement. If the wheel stops abruptly, it may signal issues with the freehub mechanism.
Additionally, listen for any unusual clicking or grinding noises during this process, as they could point to problems within the ratchet and pawl system. This initial assessment helps determine if further inspection or maintenance is necessary.
Listen for Engagement
How can you guarantee your eBike’s freehub is functioning correctly? Start by spinning the rear wheel and listening for the distinct clicking sound of the ratchet and pawl mechanism. A smooth, consistent clicking indicates proper engagement.
If you hear irregular noises or no sound at all, that could signal a problem with the freehub. Pay attention to how quickly engagement occurs when you pedal; delayed engagement often points to wear or malfunction.
Additionally, note the number of clicks during a full rotation—higher tooth-to-pawl density provides quicker engagement, ensuring efficient power transfer for your ride.
Check for Resistance
After listening for engagement, the next step is to check for resistance by spinning the rear wheel. A smooth spin indicates proper freehub engagement.
Pay attention to the following:
- Spin Duration: The wheel should rotate freely for several turns.
- Noise: Listen for any clicking or grinding sounds, signaling issues.
- Continued Motion: The wheel should keep spinning after release; lack of motion suggests disengagement problems.
- Pedal Test: Engage the pedals while holding the wheel; immediate engagement confirms efficient power transfer.
These assessments help identify potential resistance issues with the freehub’s internal components, ensuring peak performance.
Checking for Engagement: Pedaling Backward
Have you ever wondered how to guarantee your eBike’s freehub is engaging correctly?
To check for engagement, pedal backward and watch the sprockets. If they rotate freely without resistance, the freehub’s mechanism is functioning properly. You should hear no clicking or grinding sounds, which indicates that the pawls are disengaging as they should.
If the sprockets move with the pedals while pedaling backward, it signals a potential issue with the ratchet and pawl mechanism, requiring inspection or replacement.
After this test, pedal forward to confirm smooth re-engagement, ensuring ideal performance during your rides. Regular checks can help maintain your freehub’s longevity.
Understanding Freehub Sounds: What to Listen For
Listening closely to the sounds your eBike’s freehub makes can provide valuable insights into its performance.
Here’s what to listen for:
- Clicking or Ratcheting: Indicates proper pawl engagement during pedaling and coasting.
- Smooth Sound: Suggests correct freehub function; excessive noise may signal wear.
- Frequency of Clicks: A higher click rate typically means better engagement and power transfer.
- Unusual Noises: Loud sounds while coasting may indicate dirty or damaged pawls needing maintenance.
Troubleshooting Freehub Issues
When troubleshooting freehub issues, start by listening for engagement sounds while pedaling; any absence of noise could indicate a problem.
Next, check for slippage during your ride, which may suggest that the freehub isn’t engaging properly.
Finally, inspect the pawl mechanism for dirt or lack of lubrication, as these can hinder performance and require immediate attention.
Listen for Engagement Sounds
How can you determine if your eBike’s freehub is functioning properly? Listening for engagement sounds is vital. Here’s what to check:
- Pedaling Forward: Listen for a distinct clicking or ratcheting sound indicating proper pawl engagement.
- Coasting: Confirm the freehub remains silent; any noise may signal internal issues.
- Spinning Wheel: While stationary, spin the rear wheel. A lack of clicking suggests engagement failure.
- Visual Inspection: Look for dirt or wear on the freehub, as a clean hub usually produces clear engagement sounds.
Regular maintenance is key to guaranteeing peak performance.
Check for Slippage
To guarantee your eBike’s freehub is functioning correctly, checking for slippage is essential. Start by spinning the rear wheel while pedaling; if the pedals turn without the wheel moving, engagement may be faulty. Listen for unusual clicking or grinding noises that indicate improper pawl engagement. Perform a manual engagement test by rotating the freehub body backward; if it turns freely, the pawls could be stuck or worn. Regular maintenance, like cleaning and lubricating the freehub, helps prevent slippage and prolongs engagement performance.
| Test Method | Expected Result | Action Needed |
|---|---|---|
| Spin wheel & pedal | Wheel moves with pedals | Check engagement |
| Listen for noises | Unusual sounds detected | Inspect freehub |
| Manual engagement test | Free rotation without resistance | Clean or replace pawls |
| Regular maintenance | Smooth operation | Lubricate and clean |
Inspect Pawl Mechanism
After checking for slippage, the next step involves inspecting the pawl mechanism to guarantee proper engagement of the freehub.
Follow these steps:
- Remove the cassette or freewheel to access the pawl mechanism.
- Check for debris or damage that could prevent pawls from springing back.
- Verify that the pawls move smoothly and re-engage without grinding or slipping when you stop pedaling.
- If you hear a catching sound or notice delayed engagement, consider lubricating or replacing the pawls.
Regular maintenance of the pawl mechanism guarantees peak freehub performance and longevity.
Maintenance Tips for Optimal Freehub Performance
Maintaining ideal freehub performance is essential for enhancing your e-bike’s efficiency and longevity. Regularly inspect and clean the hub to prevent dirt buildup that can hinder engagement.
Use a Park Tool to lubricate the freehub with bicycle-specific grease, ensuring smooth operation of the ratchet and pawl system built into the hub.
Check engagement speed by rotating the pedals backward; the freehub should engage promptly without slipping.
Listen for unusual noises during engagement—grinding or clicking may indicate maintenance needs.
If you notice excessive wear or poor engagement, replace the freehub to maintain peak riding performance.